rsync 强化技术(手动修改端口开启防火墙的情况下)并且通过脚本只同步需要的服务器
客户端:192.168.0.22 ,192.168.0.20
服务端:192.168.0.21(源)用来同步其他服务器
我前面写过
http://chenhao6.blog.51cto.com/6228054/1298375inotify+rsync+mutt+msmtp 实现linux文件或者目录自动更新并且实现发邮件给管理员
但是有些功能不能实现,如果让你只更新格外的几台 不全部更新,你怎么办。
这里给出方案
首先192.168.0.22 客户端配置 脚本
1
2
3
4
5
6
7
8
9
10
11
12
13
14
15
16
17
18
19
20
21
22
23
24
25
26
#!/bin/bash
#客户端192.168.0.22(多台)
yum -y install rsync
cat >> /etc/rsyncd.conf << EOF
uid = root
gid = root
use chroot = no
max connections = 100
timeout = 600
pid file=/var/run/rsyucd.pid
lock file = /var/run/rsyncd.lock
log file = /var/log/rsyncd.log
[www]
path = /home/www
ignore errors
read only = no
list = no
hosts allow = 192.168.0.21/255.255.255.0
auth users = www1
secrets file = /etc/www1.pwd
EOF
echo "www1:123" >> /etc/www1.pwd
chmod 600 /etc/www1.pwd
echo "Welcome to use the rsync services" >> /var/rsyncd.motd
/usr/bin/rsync --daemon
echo "/usr/bin/rsync --daemon" >> /etc/rc.local
192.168.0.20 客户端配置 脚本
1
2
3
4
5
6
7
8
9
10
11
12
13
14
15
16
17
18
19
20
21
22
23
24
25
26
27
28
#!/bin/bash
#客户端192.168.0.20
#这些配置文件的意思以前的文章写过具体请看头上的连接
yum -y install rsync
cat >> /etc/rsyncd.conf << EOF
uid = root
gid = root
use chroot = no
max connections = 100
timeout = 600
pid file=/var/run/rsyucd.pid
lock file = /var/run/rsyncd.lock
log file = /var/log/rsyncd.log
[www]
path = /home/www
ignore errors
read only = no
list = no
hosts allow = 192.168.0.21/255.255.255.0
#这里注释掉,允许谁访问如果多台就空格加192.168.0.22/255.255.255.0
auth users = www1
secrets file = /etc/www1.pwd
EOF
echo "www1:123" >> /etc/www1.pwd
chmod 600 /etc/www1.pwd
echo "Welcome to use the rsync services" >> /var/rsyncd.motd
/usr/bin/rsync --daemon
echo "/usr/bin/rsync --daemon" >> /etc/rc.local
1
1
下面关键的时刻到了
1
service iptables start
2台服务器都运行
1
2
/usr/bin/rsync --address=192.168.0.22 --port=998 --daemon 他自己的端口
/usr/bin/rsync --address=192.168.0.21 --port=998 --daemon 更新源端口
这里就手动指定端口了
服务端192.168.0.21的配置
1
2
3
4
5
6
7
8
9
10
11
12
13
14
15
16
17
18
19
20
21
22
#客户端192.168.0.21(单台源)
yum install -y rsync
touch /root/rsync.sh
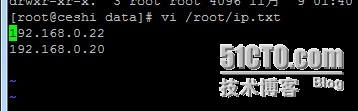
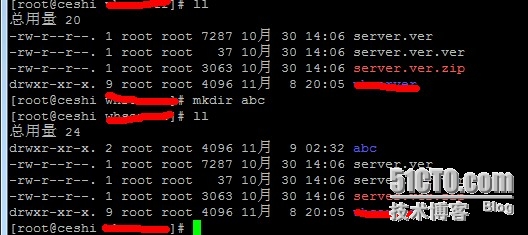
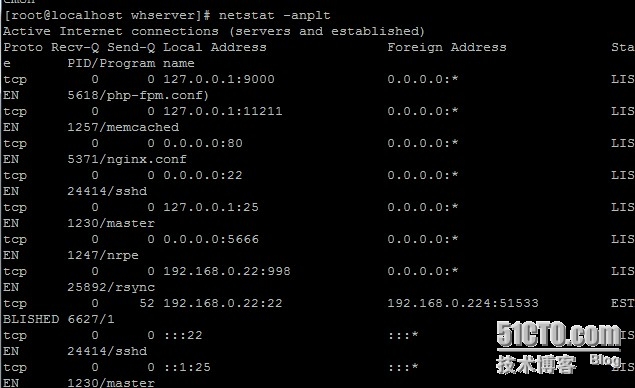
cat>/root/rsync.sh< #!/bin/bash ip=$(cat /root/ip.txt) #这里的ip.txt 是ip地址就是你想把文件更新到那几台服务器上 src=/home/www/ date=`date +%Y-%m-%d` des1=www user1=www1 for host in $ip do rsync -vzrtopg --delete --port=998 --progress ${src} ${user1}@${host}::${des1} --password-file=/etc/www1.pwd && #这里的998 是我自己指定的端口 后面有说明 if [ $? -eq 0 ] then echo "${host} , $date 更新成功" >> /root/rsync.log 2>&1 else echo "${host} , $date 更新失败" >> /root/rsync.log 2>&1 fi done 1 2 3 echo "123" >> /etc/www1.pwd chmod 600 /etc/www1.pwd chmod +x /root/rsync.sh home/www目录权限必须是root.root 才行 下面截图 因为是真实环境 目录屏蔽了 这里192.168.0.21 是root@ceshi 主机名字 root@localhost root@abc 分别为192.168.0.22,192.168.0.20主机名字 下面开始测试 2台主机那边都是空的 这里再说下ip.txt 里面有什么内容 1 2 3 [root@ceshi data]# vi /root/ip.txt 192.168.0.22 192.168.0.20 1 2 3 4 5 6 7 8 9 10 11 12 13 14 15 16 17 18 19 20 21 22 23 24 25 26 27 28 29 30 31 32 33 34 35 36 37 38 39 40 41 42 43 44 45 46 47 48 让我们运行脚本,见证奇迹 sh /root/rsync.sh 829 100% 809.57kB/s 0:00:00 (xfer#4, to-check=126/132) wh/cq* 3877 100% 3.70MB/s 0:00:00 (xfer#5, to-check=125/132) wh/nohup.out 1306196 100% 41.52MB/s 0:00:00 (xfer#6, to-check=124/132) wh/server.ver 7287 100% 229.56kB/s 0:00:00 (xfer#7, to-check=123/132) wh/server.ver.ver 37 100% 1.17kB/s 0:00:00 (xfer#8, to-check=122/132) wh/wh* 13698828 100% 14.78MB/s 0:00:00 (xfer#9, to-check=121/132) whserver/wh* 11259096 100% 6.72MB/s 0:00:01 (xfer#10, to-check=120/132) wh/wh* 21539939 100% 10.81MB/s 0:00:01 (xfer#11, to-check=119/132) wh/11233/ wh/abc/ wh/core/ wh/data/ wh/data/conf_* 1182 100% 1.28kB/s 0:00:00 (xfer#12, to-check=111/132) wh/data/server.ver 7287 100% 7.91kB/s 0:00:00 (xfer#13, to-check=110/132) wh/data/server.ver.ver 37 100% 0.04kB/s 0:00:00 (xfer#14, to-check=109/132) wh/data/server.ver.zip 3063 100% 3.32kB/s 0:00:00 (xfer#15, to-check=108/132) wh/data/versions.xml 564 100% 0.61kB/s 0:00:00 (xfer#16, to-check=107/132) wh/data/gameconfs/ wh/data/gameconfs/* 6939 100% 7.51kB/s 0:00:00 (xfer#17, to-check=103/132) wh/data/gameconfs/* 84401 100% 91.07kB/s 0:00:00 (xfer#18, to-check=102/132) wh/data/gameconfs/* 106431 100% 114.59kB/s 0:00:00 (xfer#19, to-check=101/132) wh/data/gameconfs/* 251564 100% 269.08kB/s 0:00:00 (xfer#20, to-check=100/132) wh/data/gameconfs/* 1538 100% 1.65kB/s 0:00:00 (xfer#21, to-check=99/132) wh/data/gameconfs/* 30796 100% 32.90kB/s 0:00:00 (xfer#22, to-check=98/132) sent 19301219 bytes received 2275 bytes 4289665.33 bytes/sec total size is 96052675 speedup is 4.98 sending incremental file list sent 2501 bytes received 23 bytes 5048.00 bytes/sec total size is 96052675 speedup is 38055.73yinwe 这里的目录我都屏蔽了,公司隐秘但是技术可以分享 1 2 3 [root@ceshi data]# cat /root/rsync.log 192.168.0.22 , 2013-11-09 更新成功 192.168.0.20 , 2013-11-09 更新成功 这里大家有没有发现问题,防火墙开着的情况下为啥能访问,其实我添加端口进去了 1 2 3 4 5 6 7 8 9 10 11 12 13 14 15 16 # Firewall configuration written by system-config-firewall # Manual customization of this file is not recommended. *filter :INPUT ACCEPT [0:0] :FORWARD ACCEPT [0:0] :OUTPUT ACCEPT [0:0] -A INPUT -m state --state ESTABLISHED,RELATED -j ACCEPT -A INPUT -p icmp -j ACCEPT -A INPUT -i lo -j ACCEPT -A INPUT -m state --state NEW -m tcp -p tcp --dport 22 -j ACCEPT -A INPUT -m state --state NEW -m tcp -p tcp --dport 80 -j ACCEPT -I INPUT -p tcp --dport 998 -j DROP -I INPUT -s 192.168.0.21/32 -p tcp --dport 998 -j ACCEPT -A INPUT -j REJECT --reject-with icmp-host-prohibited -A FORWARD -j REJECT --reject-with icmp-host-prohibited COMMIT 只允许21能访问998端口 这里实现了一起同步,如果个别同步怎么做,其实很简单,脚本已经出来了,只要修改ip.txt就行了 这里我新建个文件夹 1 2 3 4 #注释掉不需要的ip地址 [root@ceshi whserver]# vi /root/ip.txt 192.168.0.22 #192.168.0.20 1 2 3 4 5 6 [root@ceshi whserver]# sh /root/rsync.sh sending incremental file list ./ abc/ sent 2523 bytes received 30 bytes 5106.00 bytes/sec total size is 96052675 speedup is 37623.45 这样的效果也达到了,安全也达到了,但是如果中心就做热备份2需要2台机子,怎么办,我们只需要在 1 2 3 vi /etc/rsyncd.conf #只需要在这个配置文件上修改这段话 加入主机即可 hosts allow = 192.168.0.21/255.255.255.255 192.168.0.22/255.255.255.255 防火墙也是一样的 1 2 3 -I INPUT -p tcp --dport 998 -j DROP -I INPUT -s 192.168.0.21/32 -p tcp --dport 998 -j ACCEPT -I INPUT -s 192.168.0.20/32 -p tcp --dport 998 -j ACCEPT 这样既保证了安全也保证了另外的需求,也可以用监控实时监控只要移动修改删除增加,都会自动同步,但是不建议,如果你只需要更新几台服务器 就用我这种办法。实验已经完成,已经同步测试。需求达到,并且端口可以自定义 1 2 /usr/bin/rsync --address=192.168.0.22--port=998 --daemon 他自己的端口 /usr/bin/rsync --address=192.168.0.21 --port=998 --daemon 更新源端口 本文转自 cs312779641 51CTO博客,原文链接:http://blog.51cto.com/chenhao6/1322579